
"2024 Approved How to Add Subtitles to IGTV Videos?"
Integrating Text Overlays Into Social Media Streaming
How to Add Subtitles to IGTV Videos?

Shanoon Cox
Mar 27, 2024• Proven solutions
During the process of editing an IGTV video, you have to think about the audience that is going to watch that video. The vast majority of people who can see your IGTV posts will be viewing them from a mobile device, which is why your content has to be mobile-friendly. Subtitles should be included in all videos you post on IGTV since they will make your videos more accessible to people with hearing impairment as well as to those IGTV users who for whatever reason can’t turn on the sound while they are watching your video. Read on if you would like to find out how you can add subtitles to IGTV videos because in this article we are going to show you how you can accomplish this effortlessly.
Add Subtitles to IGTV Videos from Mac and PC Computers Using Filmora
IGTV videos are vertically oriented, so you can’t just create an SRT file that contains the subtitles. The subtitles for IGTV videos have to be hardcoded. This means that the subtitles are going to be an integral part of the video and that you have to add them to the video during the post-production process.


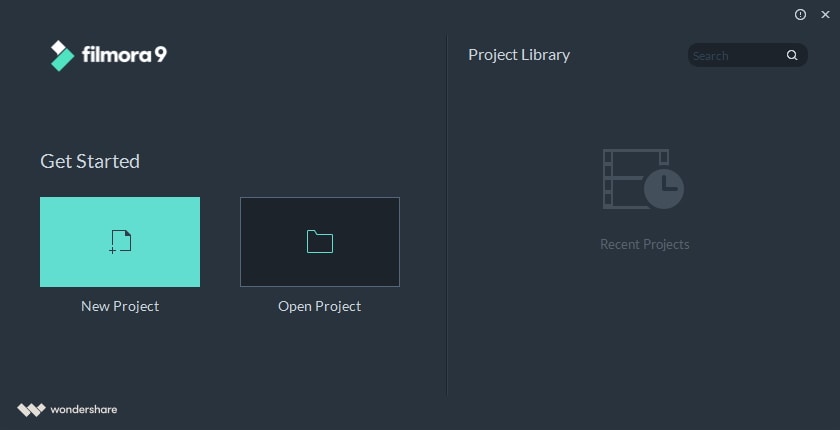
We are going to show you how to add subtitles to videos in Filmora because you don’t have to be an experienced filmmaker in order to use this video editing software. After installing Filmora on your Mac or PC computer, double-click on its desktop icon to launch it. The welcome window will appear on the screen asking you if you want to continue working on a recent project or if you want to create a new project.
Choose the New Project option and then once the project opens, head over to File menu and select Project Settings from the list. The Project Settings window will pop up on the screen and you should change the resolution to 1080x1920 (9:16) and increase the Frame Rate to 30fps.

Click on the OK button to confirm the changes, and then go to the Media panel to import the video you would like to edit. The fastest way to add media files to your project is to just drag them from the folder in which they are stored and drop them to the Media panel. You can also click on the Import drop-down menu and select the Import Media Files option from the list.
Place the video file on the timeline, and then return to the File menu, and click on the Preferences option. Click on the Editing tab in the Preferences window and make sure that the Crop to Fit feature is selected in the Photo Placement drop-down menu.
Click on the Ok button to confirm the changes, and then proceed to add the Basic Blur effect to the video from the Background Blur submenu in the Effects panel.

You can then cut or trim the video, add filters or perform any other video editing action you want. Keep in mind that you shouldn’t start adding subtitles before you finish editing your IGTV video. When you have the final draft of the video ready, you should make a transcript. You can do this by exporting the video from Filmora, and uploading it to YouTube in order to automatically create closed captions, but it is much better if you create the transcript manually, because that way you will reduce the chances of making a mistake.
Once you have all the text ready, you should go to the Titles panel and click on the Subtitles submenu. Filmora features a huge library of fully customizable subtitles, so you should just pick the option that you like the most and add it to the timeline. Add a subtitle file to the exact location on the timeline where particular words are said, and then double-click on it to start adding the text to your IGTV video. Keep in mind that you are going to have to go through the same process for each new sentence.

You can choose from a variety of preset text styles, and you can select the font, color or the size of the text. Click on the Advanced button if you would like to customize the text and create as many text layers as you need to cover all the dialogues or the narration in the video.
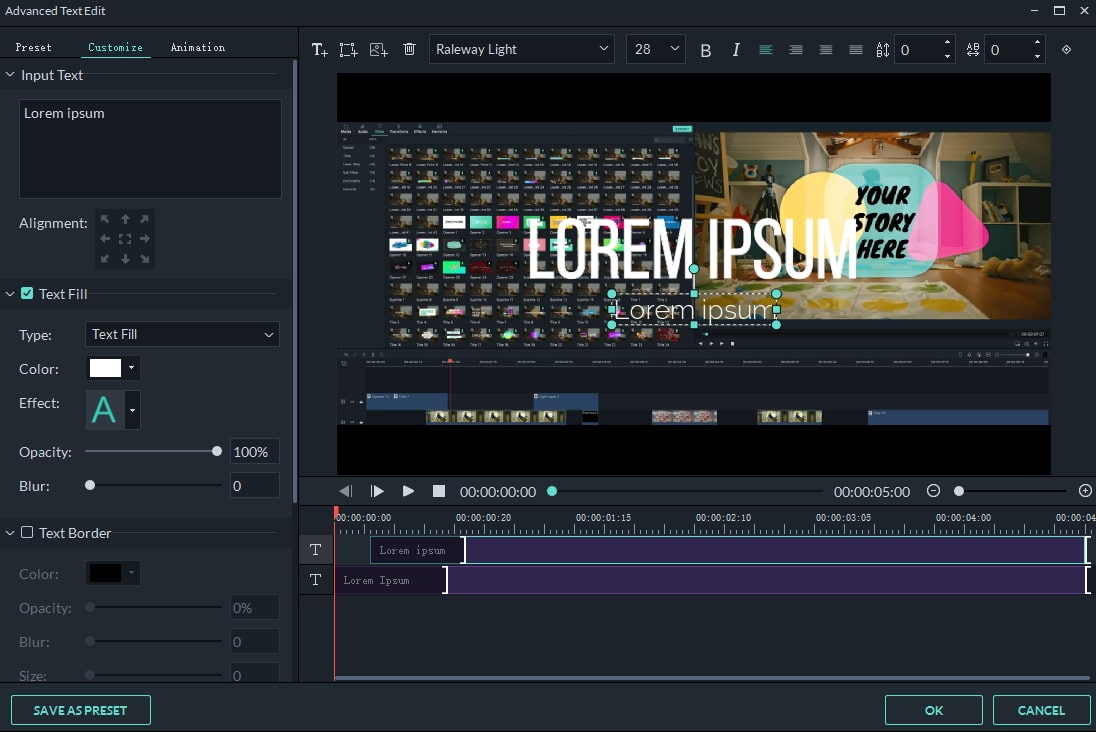
Adding subtitles to a video can be a painstakingly long process if you’re working with a lot of text, so arm yourself with patience and do your best to be as precise as you possibly can, because lagging subtitles can create a lot of confusion. Besides adding the title and text, you can add some animation effects such as typewriter animation to the typed texts. Learn more about How to add typewriter effects to videos in details.
Once you’re done adding the subtitles you should click on the Photo Camera icon to take a snapshot of the video, you can use as a cover photo for your IGTV video. Export the video and proceed to upload it to IGTV from your web browser or from your phone.
How to Add Text to IGTV Videos with the Quik App For iOS and Android Devices
In case you like editing IGTV videos from your phone, you can try adding subtitles to your IGTV videos with the Quik app. After you’ve completed all other video editing tasks, you should tap on the Text icon and type in the text you’d like to add to the video. Hit the OK button after you’ve added the text and that’s it you’ve successfully created the subtitles for your IGTV video. How long the process of creating hardcoded subtitles is going to last depends on the duration of the video and the amount of narration or dialogue in the video.
Tips for Adding Subtitles to IGTV Videos
While adding text to your IGTV you must pay close attention that the text is clearly visible on the screen and that the app’s interface isn’t going to cover it once you upload the video to IGTV. Furthermore, the text color should match the background so that the viewers can easily read everything that is displayed on the screen**. Avoid placing the text too close to the edges of the frame,** since different phone models have slightly different aspect ratios. As a consequence, your IGTV videos are going to be cropped, and parts of the subtitles can be rendered invisible to the audience. That’s why you have to position the text within the frame carefully and do your best to overcome the technical limitations imposed by the IGTV platform.
Conclusion
Even though adding subtitles to videos can require a lot of precision and attention to detail, it can help you produce content that attracts a lot of attention on IGTV. However, most videos shared on IGTV don’t surpass a two-minute mark, so even if there is a lot of dialogue, you can add hardcoded subtitles to a video in a relatively short period of time. What is your favorite method of adding subtitles to the videos you upload to your IGTV channel? Leave a comment below and share your experiences with us.
Shanoon Cox
Shanoon Cox is a writer and a lover of all things video.
Follow @Shanoon Cox
Shanoon Cox
Mar 27, 2024• Proven solutions
During the process of editing an IGTV video, you have to think about the audience that is going to watch that video. The vast majority of people who can see your IGTV posts will be viewing them from a mobile device, which is why your content has to be mobile-friendly. Subtitles should be included in all videos you post on IGTV since they will make your videos more accessible to people with hearing impairment as well as to those IGTV users who for whatever reason can’t turn on the sound while they are watching your video. Read on if you would like to find out how you can add subtitles to IGTV videos because in this article we are going to show you how you can accomplish this effortlessly.
Add Subtitles to IGTV Videos from Mac and PC Computers Using Filmora
IGTV videos are vertically oriented, so you can’t just create an SRT file that contains the subtitles. The subtitles for IGTV videos have to be hardcoded. This means that the subtitles are going to be an integral part of the video and that you have to add them to the video during the post-production process.
We are going to show you how to add subtitles to videos in Filmora because you don’t have to be an experienced filmmaker in order to use this video editing software. After installing Filmora on your Mac or PC computer, double-click on its desktop icon to launch it. The welcome window will appear on the screen asking you if you want to continue working on a recent project or if you want to create a new project.
Choose the New Project option and then once the project opens, head over to File menu and select Project Settings from the list. The Project Settings window will pop up on the screen and you should change the resolution to 1080x1920 (9:16) and increase the Frame Rate to 30fps.
Click on the OK button to confirm the changes, and then go to the Media panel to import the video you would like to edit. The fastest way to add media files to your project is to just drag them from the folder in which they are stored and drop them to the Media panel. You can also click on the Import drop-down menu and select the Import Media Files option from the list.
Place the video file on the timeline, and then return to the File menu, and click on the Preferences option. Click on the Editing tab in the Preferences window and make sure that the Crop to Fit feature is selected in the Photo Placement drop-down menu.
Click on the Ok button to confirm the changes, and then proceed to add the Basic Blur effect to the video from the Background Blur submenu in the Effects panel.
You can then cut or trim the video, add filters or perform any other video editing action you want. Keep in mind that you shouldn’t start adding subtitles before you finish editing your IGTV video. When you have the final draft of the video ready, you should make a transcript. You can do this by exporting the video from Filmora, and uploading it to YouTube in order to automatically create closed captions, but it is much better if you create the transcript manually, because that way you will reduce the chances of making a mistake.
Once you have all the text ready, you should go to the Titles panel and click on the Subtitles submenu. Filmora features a huge library of fully customizable subtitles, so you should just pick the option that you like the most and add it to the timeline. Add a subtitle file to the exact location on the timeline where particular words are said, and then double-click on it to start adding the text to your IGTV video. Keep in mind that you are going to have to go through the same process for each new sentence.
You can choose from a variety of preset text styles, and you can select the font, color or the size of the text. Click on the Advanced button if you would like to customize the text and create as many text layers as you need to cover all the dialogues or the narration in the video.
Adding subtitles to a video can be a painstakingly long process if you’re working with a lot of text, so arm yourself with patience and do your best to be as precise as you possibly can, because lagging subtitles can create a lot of confusion. Besides adding the title and text, you can add some animation effects such as typewriter animation to the typed texts. Learn more about How to add typewriter effects to videos in details.
Once you’re done adding the subtitles you should click on the Photo Camera icon to take a snapshot of the video, you can use as a cover photo for your IGTV video. Export the video and proceed to upload it to IGTV from your web browser or from your phone.
How to Add Text to IGTV Videos with the Quik App For iOS and Android Devices
In case you like editing IGTV videos from your phone, you can try adding subtitles to your IGTV videos with the Quik app. After you’ve completed all other video editing tasks, you should tap on the Text icon and type in the text you’d like to add to the video. Hit the OK button after you’ve added the text and that’s it you’ve successfully created the subtitles for your IGTV video. How long the process of creating hardcoded subtitles is going to last depends on the duration of the video and the amount of narration or dialogue in the video.
Tips for Adding Subtitles to IGTV Videos
While adding text to your IGTV you must pay close attention that the text is clearly visible on the screen and that the app’s interface isn’t going to cover it once you upload the video to IGTV. Furthermore, the text color should match the background so that the viewers can easily read everything that is displayed on the screen**. Avoid placing the text too close to the edges of the frame,** since different phone models have slightly different aspect ratios. As a consequence, your IGTV videos are going to be cropped, and parts of the subtitles can be rendered invisible to the audience. That’s why you have to position the text within the frame carefully and do your best to overcome the technical limitations imposed by the IGTV platform.
Conclusion
Even though adding subtitles to videos can require a lot of precision and attention to detail, it can help you produce content that attracts a lot of attention on IGTV. However, most videos shared on IGTV don’t surpass a two-minute mark, so even if there is a lot of dialogue, you can add hardcoded subtitles to a video in a relatively short period of time. What is your favorite method of adding subtitles to the videos you upload to your IGTV channel? Leave a comment below and share your experiences with us.
Shanoon Cox
Shanoon Cox is a writer and a lover of all things video.
Follow @Shanoon Cox
Also read:
- [New] 2024 Approved Mastering Smooth Playback on Instagram Videos
- [New] Assessing the Best Platform for Individual Use TikTok vs Shorts for 2024
- [New] In 2024, From Basic to Breathtaking Elevating Your Instagram Edits
- [New] The Earning Equation on YouTube Daily Average From AdSense Payouts Per K Views
- [New] The Ultimate Guide to Cross-Social Sharing for 2024
- [Updated] In 2024, Becoming a Pro at Using IGTV for Business and Personal Growth
- [Updated] Interpreting Instagram's Per-Video Timeframe Rule
- [Updated] Quick Guide to Troubleshoot Instagram Videos for 2024
- 2024 Approved Unlock IG Success with Expert Insights on Loop Videos
- 27 Significant Metaverse Demonstrations Unveiled for 2024
- Dive Deep Into Gesture Recognition Systems
- Does Life360 Notify When You Log Out On Honor 90 Lite? | Dr.fone
- Expert Tips to Boost Visual Impact AE's 10 Text Sets for 2024
- Groundbreaking Tools to Create Instagram Grids That Wow
- In 2024, Complete Guide For Apple iPhone 6s Plus Lock Screen
- In 2024, Did Your Apple iPhone 12 mini Passcode Change Itself? Unlock It Now
- In 2024, Diverse Video Editing Apps for PC Users
- In 2024, Syncopated Shots Picking the Best Music for Social Media
- Tips and Solutions for Dealing with Unavailable PC Support on Rockstar Games
- Title: 2024 Approved How to Add Subtitles to IGTV Videos?
- Author: Nova
- Created at : 2024-11-26 20:02:53
- Updated at : 2024-11-30 04:39:38
- Link: https://instagram-videos.techidaily.com/2024-approved-how-to-add-subtitles-to-igtv-videos/
- License: This work is licensed under CC BY-NC-SA 4.0.